
Sustainable Bike Seat Cover
A group product design project for an engineering class
Tools
SolidWorks, solder, sewing, drill press, EcoAudit
In a nutshell
My teammates and I were given 7 weeks to “Create a product that will improve lives on campus and beyond.”
Based on our shared passion for sustainability and micro-mobility, we designed a sustainable bike seat cover to improve the common experience of having a wet bike seat after storing one’s bike outside.
My contributions in a team of four
Acted as project manager
Contributed to user research
Created the CAD model
Co-led prototyping and benchmark testing

Needfinding
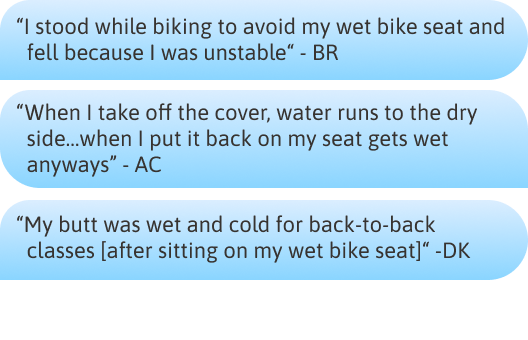
We interviewed a total of 20 student bike commuters, and learned three pain points of a wet bike seat:
Wet pants all-day
Slipping and falling
A daily inconvenience
In a subsequent survey answered by 40 students, we found that 74% of bikers find wet bike seats “very bothersome”
How might we keep students’ bike seats dry outside?
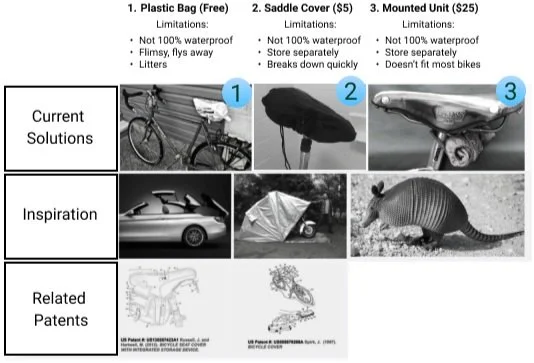
Design pre-work
To empathize with the wet seat problem, we all documented current solutions found on campus. A teammate and I tested each solution and found all to be inadequate in keeping a bike seat dry.
During this phase, a teammate searched for inspiration and reviewed existing patents.
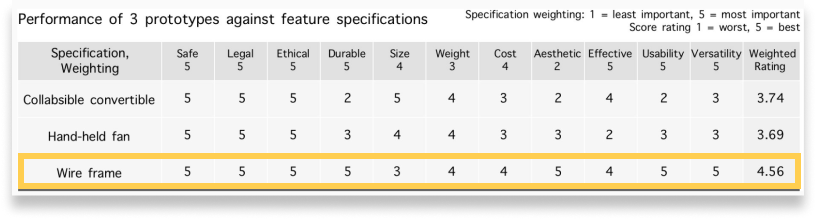
Feature specification
We collectively defined ethical and usability specifications for our product.
For each specification, we justified the reason for the specification (column 2), and what would quantify fulfillment (column 3).

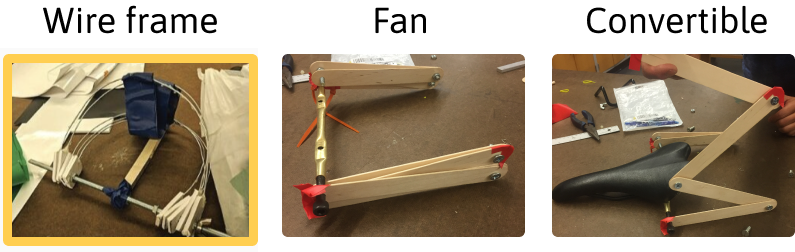
Initial prototypes
We created 3 prototypes and rank-ordered them based on performance. The wire frame design performed best, being the most durable, effective, and attractive.
Refining the prototype
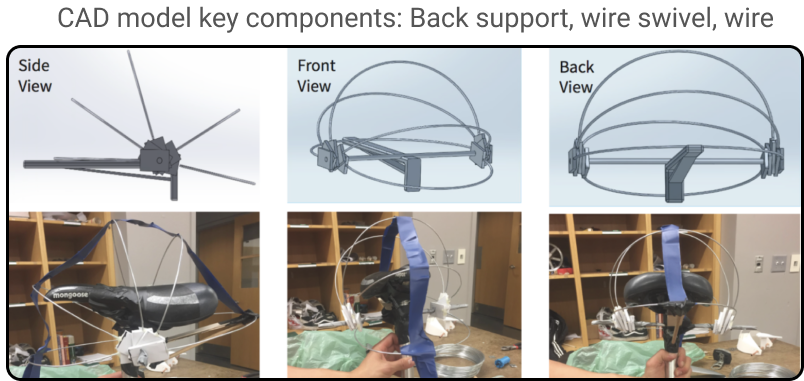
CAD Model
Once settled on a design, I made a CAD model of our prototype in SolidWorks to specify the dimensions for replicability purposes.
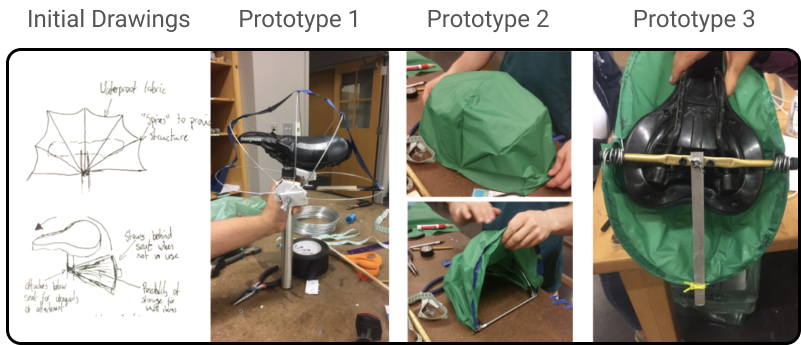
Prototype iterations
Two main improvements for Prototype 3:
Heat-treated wire loop attachments
Universal fit for seats with attachment rails
Heat-treated wire attachments:
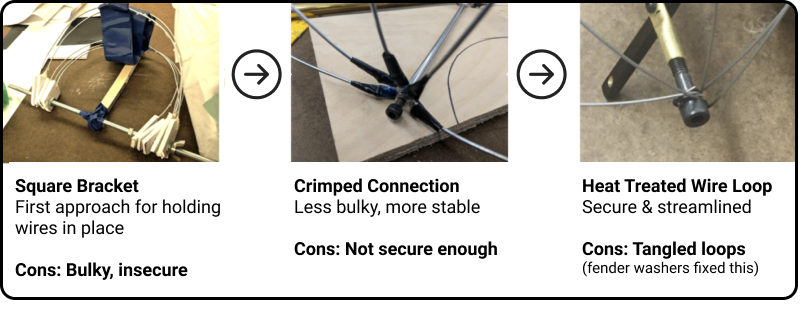
We tried three methods for attaching the wire ribs to the post.
Based on advice from a machine shop advisor, I created heat-treated wire loops. We ended up choosing this option because they were the most secure and streamlined.
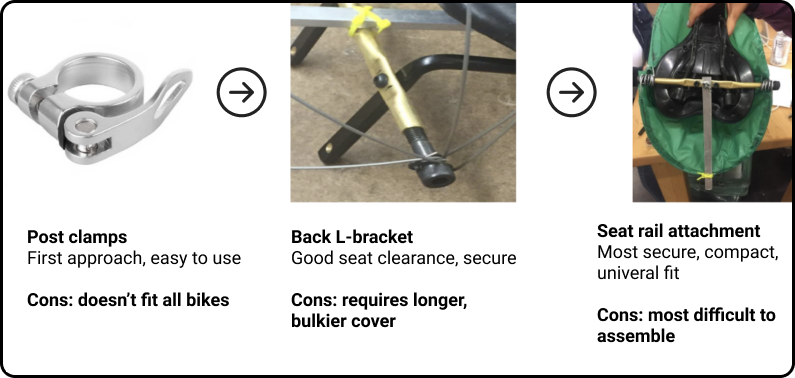
Universal bike attachment:
My teammate tested three mounting options to attach the prototype to a bike. The under-seat screw version most securely fit a range of bike seats.
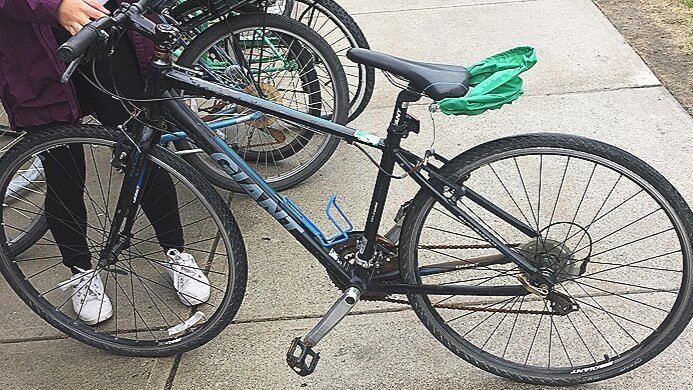
Testing the prototype
Benchmark testing
Our final prototype successfully passed the six benchmark tests required to deem our design successful

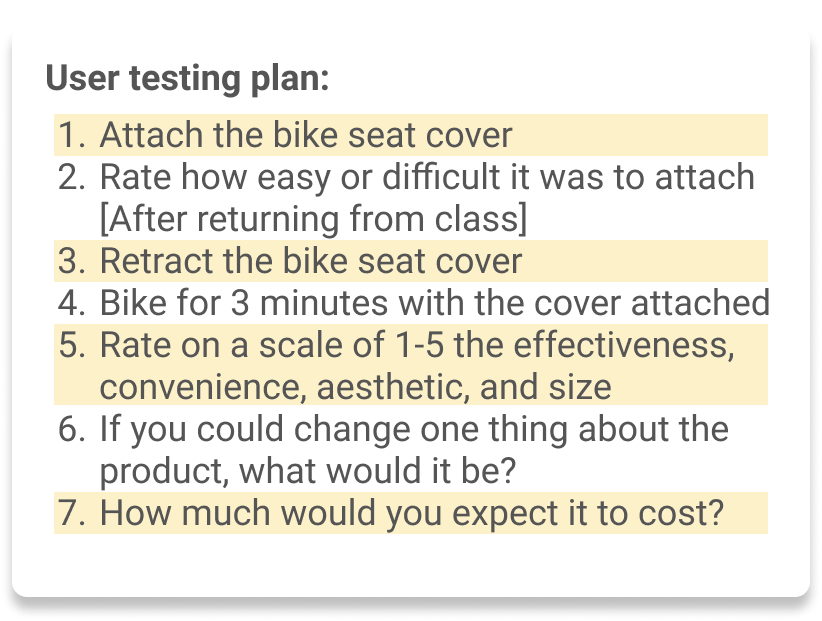
User testing
To ensure our test aligned with realistic circumstances, we arranged testing to take place before and after classes on rainy days (fortunately, it was a rainy spring).
Before class, we observed how a participant would mount the prototype onto their bike.
After class, we captured their reaction to the effectiveness of the design.

Key results
Participants found the bike seat cover to be overall very effective, convenient, and unobstructive (size).
The attachment received an unfavorable average score (2.7). Participants struggled to attach the cover but reported that they wouldn’t mind the < 5-minute struggle if it only needed to be attached once.
Participants would spend an average of $17 for a bike seat cover
Final steps
Ethics
Together, we completed a Product/Process Evaluation and Ethics Questionnaire to ensure our product was ethical regarding the topics:
Safety, materials, manufacturing, inclusivity,
unintended users, patent infringement
Sustainability
We crafted the frame using recycled metal. In production, we would use fabric sourced from recycled water bottles. My partner completed an eco-audit to compare our product to others on the market and confirmed that our product was the more sustainable option.
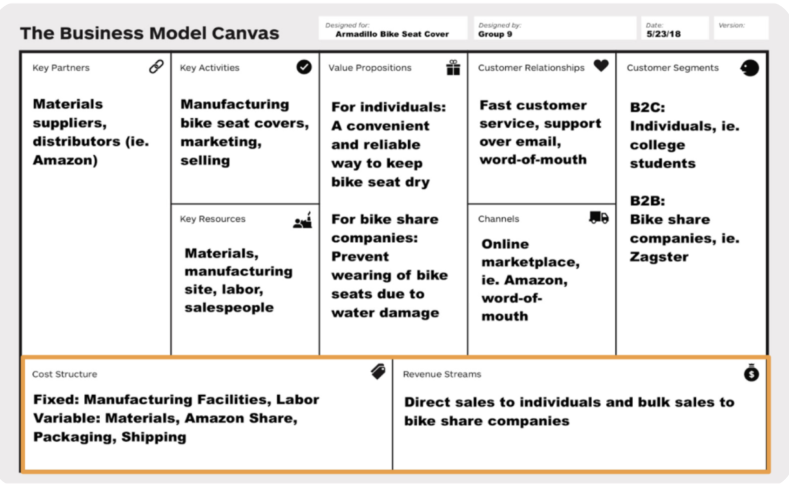
Business model (a teammates work)
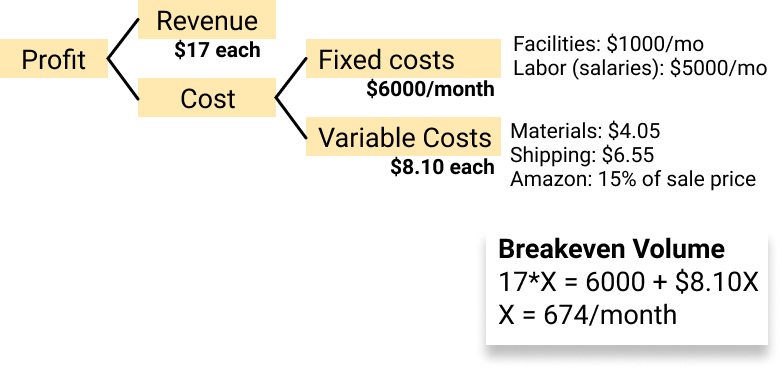
Breakeven volume (my calculations)
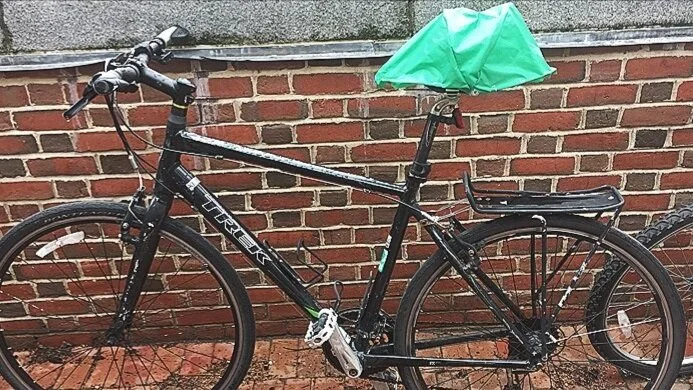
Final product


Ideas for future improvements
Increase ease of attaching the product
Reflective fabric (safety for night riding)
Spring-loaded system & elastic pull to fasten more securely to the seat
Reflection
This project helped me gain confidence in the machine shop. Although our final prototype is relatively simple, I learned a lot about physical fabrication through experimentation with other technologies such as 3D printing, laser cutting and arduinos.